| Music compose editor software |
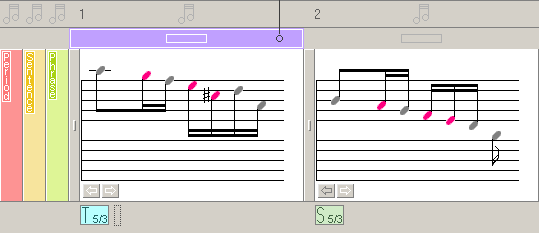
HOW TO USE THE VARIOUS METHODS OF MOTIVE DEVELOPMENT. EXAMPLE:Table of Contents Previous NextYou need to specify three items to create a new derived Motive. First, the initial Motive. The initial Motive is input data for a method of motive development. Second, the motive, which will precede the new Motive. Third, a chord for the new Motive. Read more about the motive development here. Read about the principles of a melody development here. Figure 1. Choose the initial Motive. The initial Motive is input data for a method of motive
development. You may choose any Motive of a melody as the initial Motive. Then move
the cursor to the panel (see number
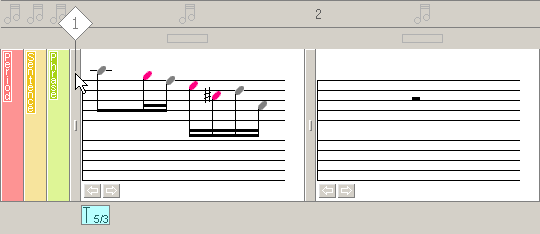
Figure 2. In our example, we use the 'Sequence Down' method of motive development. While
the mouse is pressed, move the Motive (see number
Figure 3. The program displays the dialog 'Wizard - Motive Development'. The dialog helps
to create a new derived Motive. On the first step, it is necessary to specify a
Motive, which will precede the new Motive. The initial Motive and the previous Motive
is not the same. You may choose an any Motive of a melody as the initial Motive.
On this step, we choose the Motive, which will precede the new Motive on the note
stave. In some cases the initial Motive and the previous Motive are represented
by the same Motive. This example, for the instance. The Demo Script (press the 'How
to' button, or use the 'Demo' menu) demonstrates a variant where the initial Motive
and the previous Motive are represented by different Motives. Click the mouse button
on the area that is located above the Motive (see number
Figure 4. Press the 'Next' button (see number
Figure 5. On the second step, the Wizard suggests to choose a chord for the new Motive
in the Chord Editor that
appears on the right (see number
Figure 6. Choose the chord and press the 'Finish' button that is located at the bottom
of the dialog 'Wizard - Motive Development' (see number
Figure 7. You may listen the new Motive by pressing the button, marked by the number
Figure 8. You can see the result on Figure 8. Table of Contents Previous Next Copyright (c) 2003 - 2005 Ilya Schepikhin. All rights reserved. |
 on Figure 1) and press
the mouse button.
on Figure 1) and press
the mouse button. 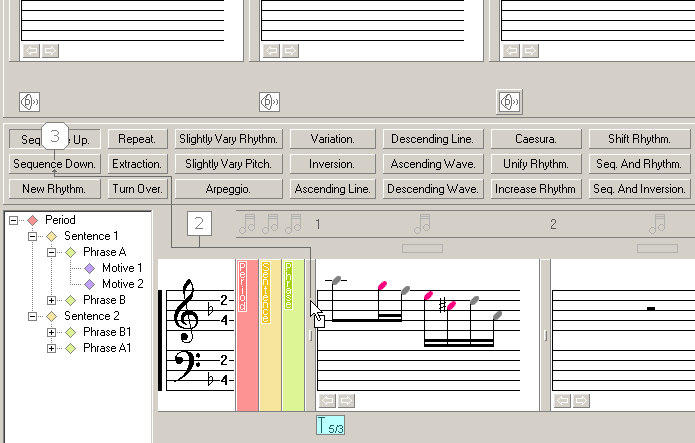
 on Figure 2) to the tab
signed 'Sequence Down' (see number
on Figure 2) to the tab
signed 'Sequence Down' (see number
 on Figure 2). Now release
the mouse button.
on Figure 2). Now release
the mouse button. 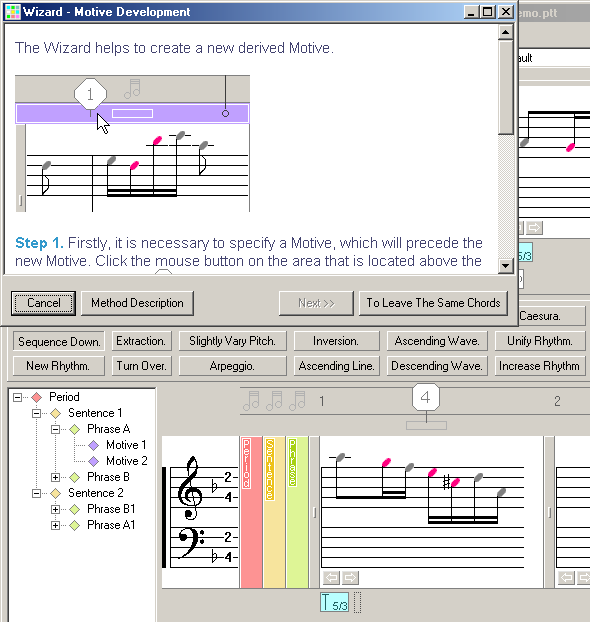
 on Figure 3) that is
chosen to precede the new Motive. After the click, the area changes the colour from
the grey colour to the lilac colour. Furthermore an arrow that connects the Motive
and a panel with the derived Motives appears. The Motive, which precedes the new
Motive should have a full set of chords. The Wizard needs to know the previous Motive
to be able to suggest the suitable chords that can follow a last chord of the previous
Motive (see step two). Moreover, some methods of the motive development move the
notes of the new Motive to smooth the transition from the previous Motive to the
new one. For this purpose it is also necessary to know the previous Motive.
on Figure 3) that is
chosen to precede the new Motive. After the click, the area changes the colour from
the grey colour to the lilac colour. Furthermore an arrow that connects the Motive
and a panel with the derived Motives appears. The Motive, which precedes the new
Motive should have a full set of chords. The Wizard needs to know the previous Motive
to be able to suggest the suitable chords that can follow a last chord of the previous
Motive (see step two). Moreover, some methods of the motive development move the
notes of the new Motive to smooth the transition from the previous Motive to the
new one. For this purpose it is also necessary to know the previous Motive. 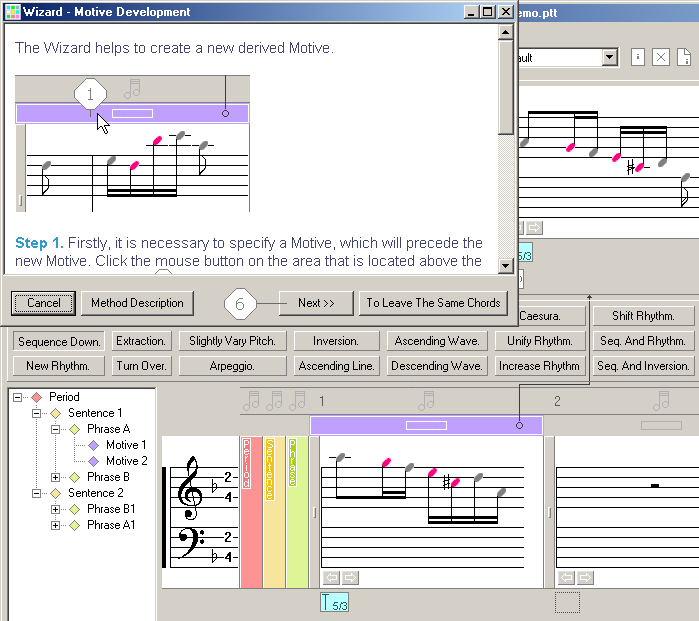
 on Figure 4) to continue.
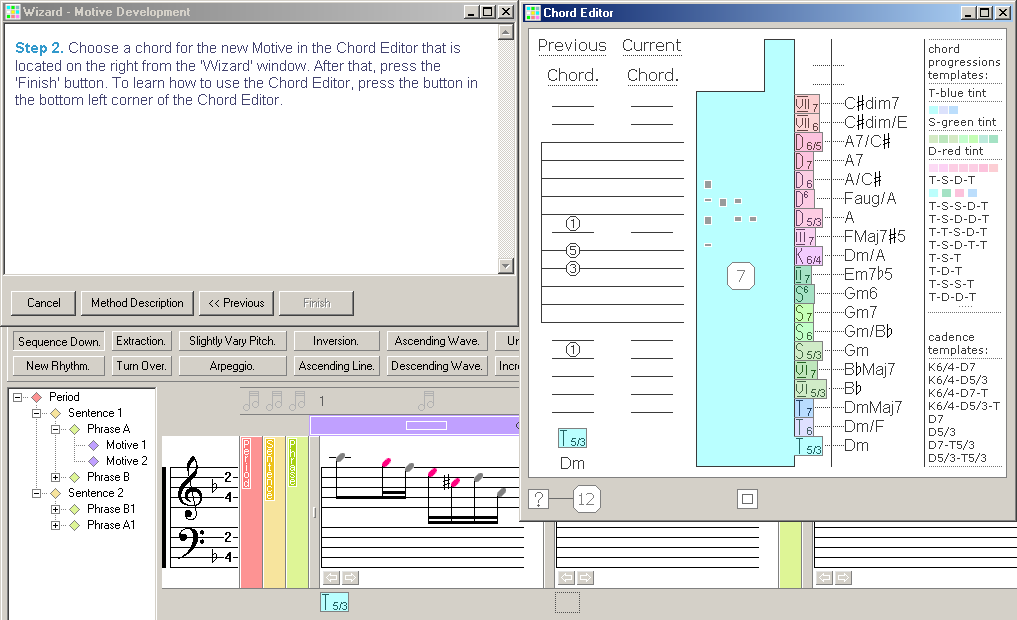
 on Figure 5). To learn
how to use the Chord Editor, press the button in the bottom left corner of the Chord
Editor (see number
on Figure 5). To learn
how to use the Chord Editor, press the button in the bottom left corner of the Chord
Editor (see number  on Figure 5).
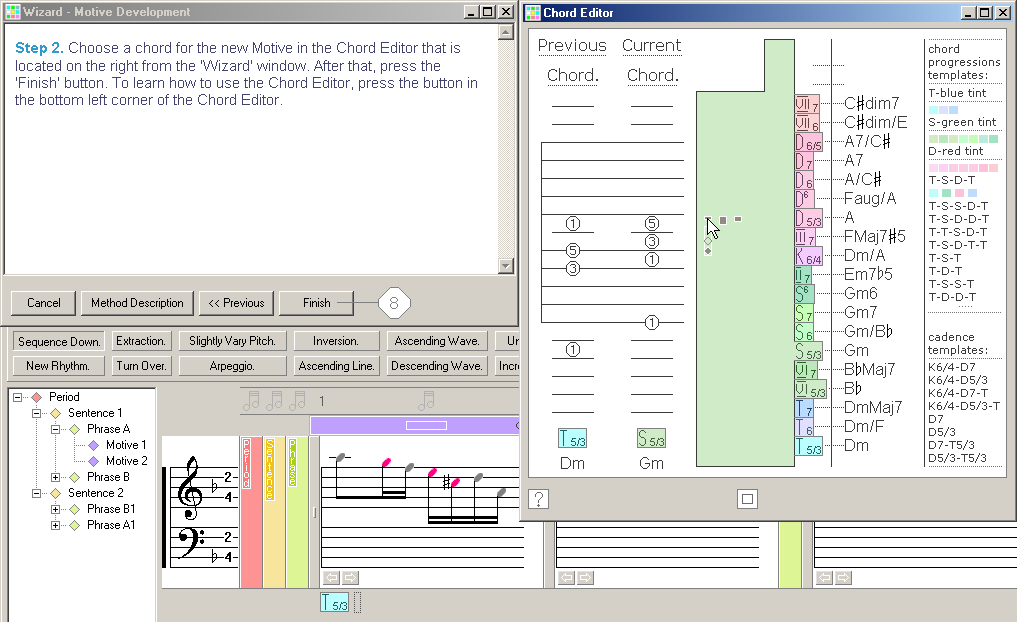
 on Figure 6).
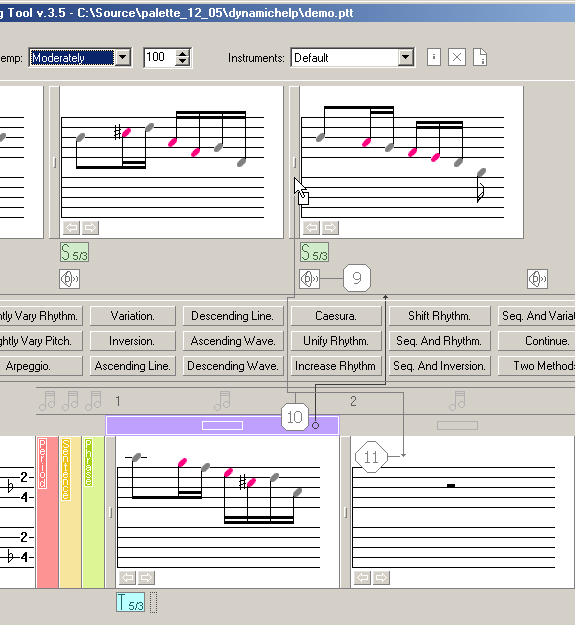
 on Figure 7. Now move the
cursor to the panel that is located on the left from the new Motive and press the
mouse button. While the mouse is pressed, move the cursor (see number
on Figure 7. Now move the
cursor to the panel that is located on the left from the new Motive and press the
mouse button. While the mouse is pressed, move the cursor (see number
 on Figure 7) to the position,
that is marked by number
on Figure 7) to the position,
that is marked by number  on Figure 7. Now release the mouse button. This copies the new Motive into the stave.